I’ve loved baking for as long as I can remember. There’s something about turning a handful of simple ingredients into something delicious that has always drawn me to the oven—our oven.
My journey into bread baking, however, started for a slightly different reason. I realized that I had a sensitivity to gluten, and store-bought bread in particular never seemed to agree with me. It would often leave me feeling bloated, but giving up bread was never really an option. I mean, it’s just too good! And if Jesus Himself declared, “I am the bread of life” (John 6:35), then surely bread, in its simplest form, has to be worth holding onto.
So, I started making my own.
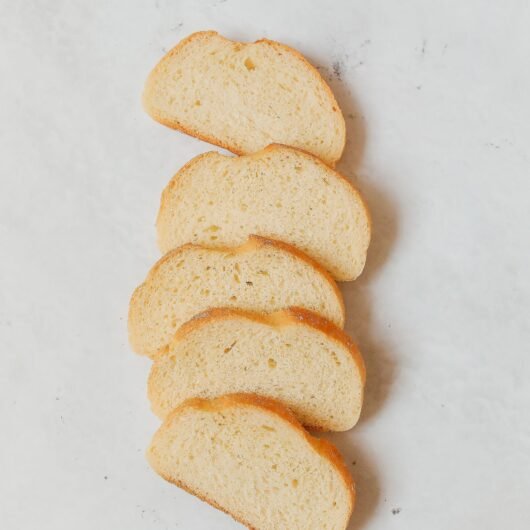
I tried recipe after recipe I found online, hoping to recreate that soft, fluffy, slightly chewy texture of the bread I grew up eating. But something was always missing. Many homemade bread recipes had a noticeable yeasty flavor, while others didn’t seem to focus enough on developing the gluten. The result was good bread, but it wasn’t that bread—the soft, tender, familiar loaf I actually wanted.
That sent me back into the kitchen to experiment.
I started paying closer attention to hydration, flour, kneading time, gluten development, and even the way the butter was incorporated. Batch after batch, I tweaked the recipe until I finally landed on a loaf that gave me what I had been looking for: soft, fluffy bread with a tender crumb and a beautiful golden crust.
And that’s how this recipe came to be.
I hope you love it as much as I do and maybe, like me, you’ll find yourself making another loaf before the first one is even finished.
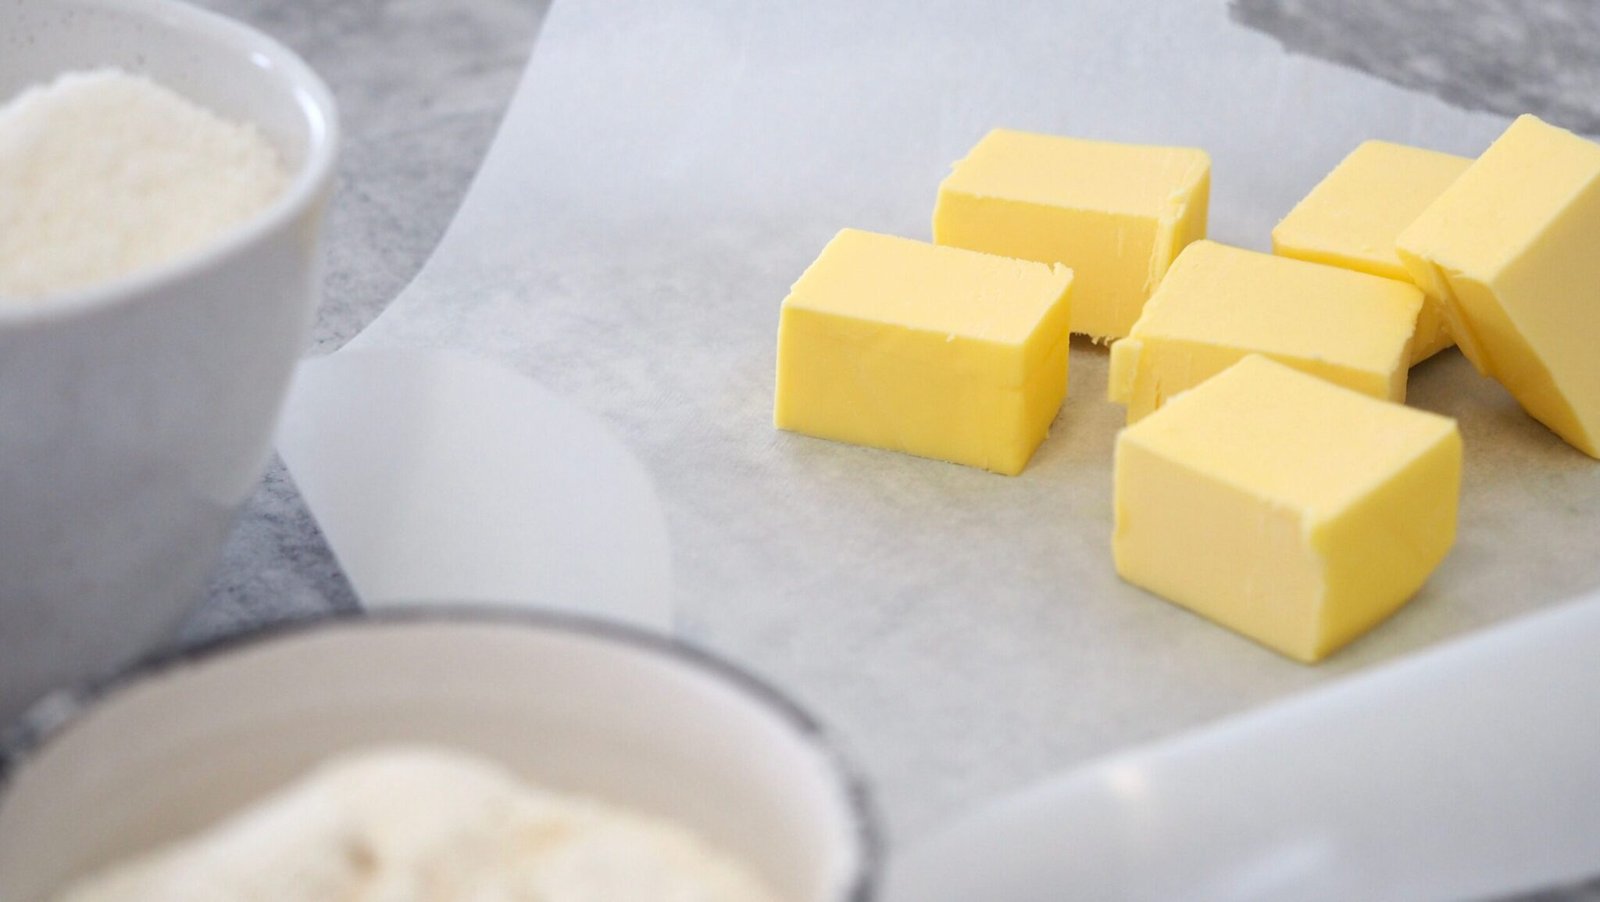
1. Bloom the Yeast
Add 400 g warmwater, 85 g granulated sugar, and 10 g yeast to the bowl of your stand mixer. Whisk everything together and let the mixture sit for 5 minutes.
Tip: If the mixture shows no signs of activity after 5 minutes, your yeast may be inactive and should be replaced before continuing.

2. Make the Dough
Once the yeast has bloomed, add the 750 g bread flour, 10 g salt, and 25 g milk powder to the bowl.
Attach the dough hook and mix on speed 2. At this stage, the dough may look somewhat rough and feel slightly sticky. Do not add additional flour. The hydration in this recipe is intentional.
3. Knead the Dough
Continue kneading on for 8–10 minutes, or until the dough begins to look smoother and more cohesive.
4. Add the Butter
Once the dough has developed some structure, add the 85 g softened butter, 1 tablespoon at a time.
Allow each addition to become incorporated before adding the next. Adding the butter gradually prevents it from overwhelming the dough and allows the developing gluten network to remain intact.
The dough may temporarily look greasy, loose, or uneven as the butter is incorporated. Don’t worry—this is completely normal. Continue mixing until the butter is fully absorbed.
You’re looking for a dough that is smooth, soft, elastic, and cohesive. Depending on your mixer, flour, and kitchen conditions, the dough may require up to 30 minutes of total kneading time.
Rather than relying solely on the clock, use the windowpane test to determine when your dough is ready.
The Windowpane Test
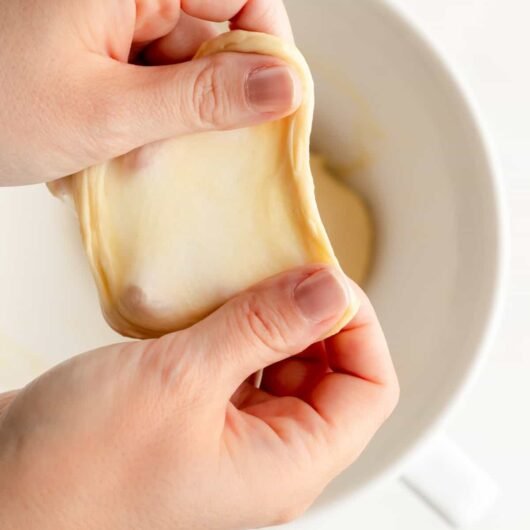
Take a small piece of dough and gently stretch it between your fingers. The dough should stretch thin enough that you can see light through it without immediately tearing.
If the dough tears easily or breaks before you can stretch it thin, continue kneading and test again after a few minutes.
Important: Resist the temptation to add flour if the dough feels sticky. The dough is intentionally hydrated, and adding extra flour can result in a denser, less tender loaf.
5. First Rise
Once the dough has passed the windowpane test, shape it into a ball and place it into a lightly greased bowl. Cover the bowl and alow the dough to rise until it has doubled in size, approximately 1 hour, depending on the temperature of your kitchen.
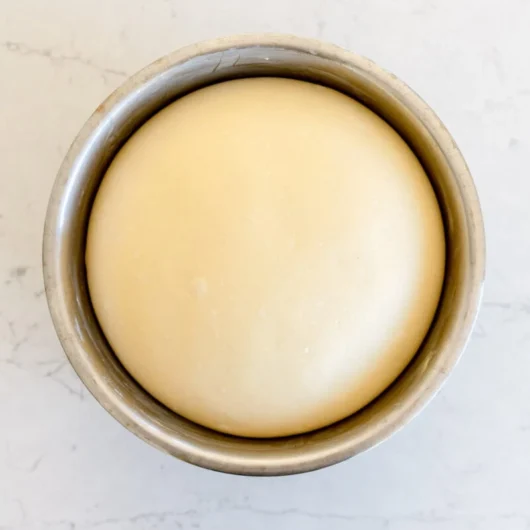
Don’t rely solely on the clock here. The dough’s appearance and volume are better indicators than a specific amount of time.
6. Divide and Rest
Once the dough has doubled in size, gently punch it down to release the excess air.
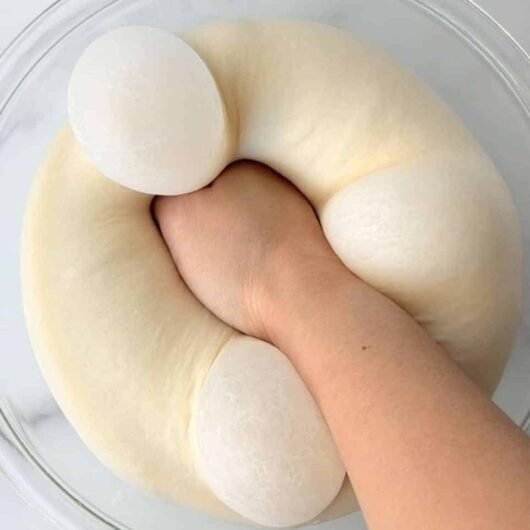
Transfer the dough to a lightly floured or un-floured work surface and divide it into two equal portions.
Shape each portion into a round ball, cover, and let the dough rest for 15 minutes. This is called a bench rest and gives the gluten time to relax, making the dough much easier to shape.
7. Shape the Loaves
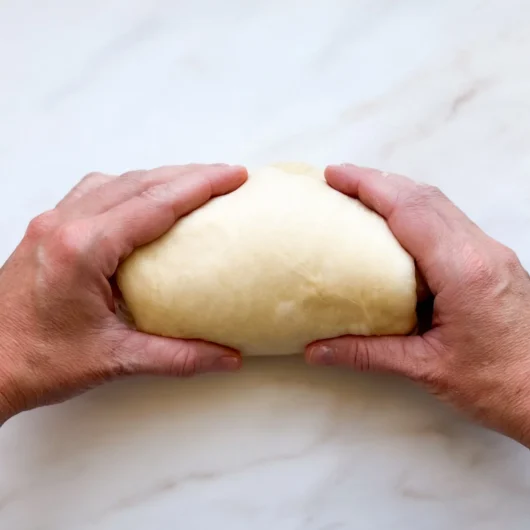
After the 15-minute rest, shape each dough ball into a loaf.
Gently flatten or stretch the dough into a rough rectangle, then roll it up tightly, starting from one end. Place each loaf into a greased loaf pan, seam-side down.
8. Second Rise
Cover the loaf pans and allow the dough to rise again.
The dough should become noticeably puffy and increase in size. The exact time will vary depending on the temperature of your kitchen, so watch the dough rather than relying entirely on a timer.
9. Bake
Preheat your oven to 350°F (175°C).
Bake the loaves for approximately 25–30 minutes in a regular oven. My oven runs quite fast, so I usually bake mine for 20–25 minutes. Keep in mind that oven temperatures and baking times can vary.
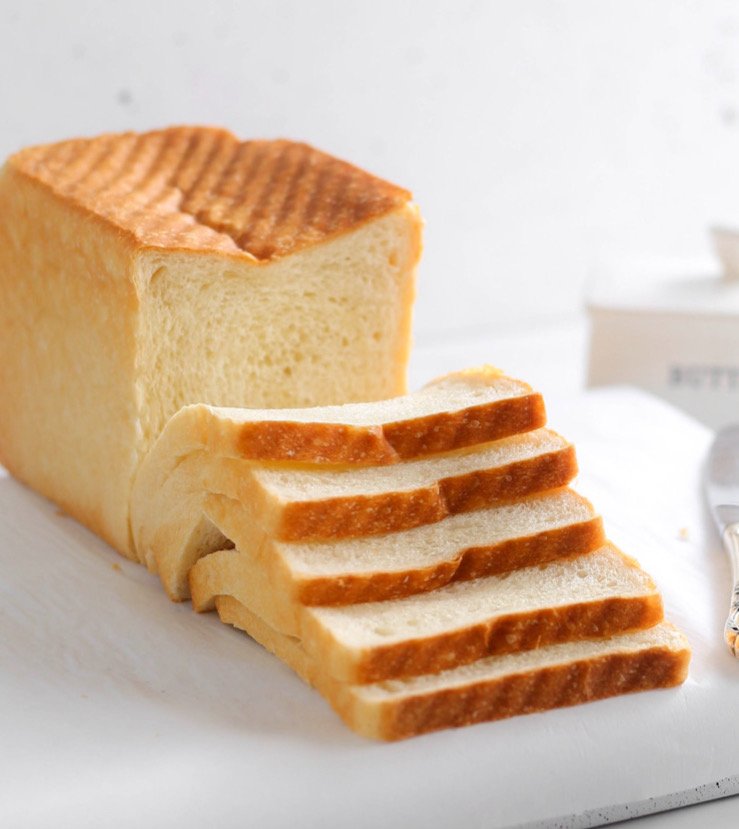
The finished bread should be beautifully golden brown on top and baked through.
10. Cool
Remove the loaves from the oven and allow them to cool in the pans for a few minutes.
Then transfer the bread to a wire rack and allow it to cool completely before slicing.
As tempting as it may be to cut into a warm loaf immediately, allowing the bread to cool gives the crumb time to finish setting. Once cooled, slice and enjoy your freshly baked sandwich bread!
Simple Sandwich Bread
2
loaves1
hour30
minutes2
hoursSoft, fluffy, and perfectly tender, this simple white bread is an easy homemade classic. With a buttery crumb and a beautifully golden crust, it’s perfect for sandwiches, toast, or enjoying warm straight from the oven.
Ingredients
400 g water, warm
85 g granulated sugar
10 g yeast
750 g bread flour
10 g salt
25 g milk powder
85 g unsalted butter, softened
Directions
- Add the warm water, granulated sugar, and yeast to the bowl of a stand mixer. Whisk to combine and let sit for about 5 minutes, or until the yeast becomes slightly foamy.
- Add the bread flour, salt, and milk powder to the yeast mixture. Using the dough hook attachment, mix on low speed until the ingredients come together and a rough dough forms.
- Continue kneading on low speed for 8–10 minutes, or until the dough begins to look smooth and cohesive.
- With the mixer running on low, add the softened butter 1 tablespoon at a time, allowing each addition to incorporate before adding the next. The dough may look slightly sticky or uneven as the butter is incorporated—this is normal.
- Once all the butter has been incorporated, continue kneading for another 10–15 minutes, or until the dough is smooth, elastic, and pulls away from the sides of the bowl. Depending on your mixer, the flour, and the temperature of your kitchen, the dough may take up to 30 minutes of total kneading time. The finished dough should feel soft and elastic rather than dense or stiff.
- Shape the dough into a ball and place it in a lightly greased bowl. Cover and allow to rise in a warm place until doubled in size, about 1 hour, depending on the temperature of your kitchen.
- Gently punch down the dough to release excess air. Divide the dough into two equal portions and shape each portion into a round ball. Cover and let rest for 15 minutes to allow the dough to relax.
- Shape each rested dough ball into a loaf and place into greased loaf pans, seam-side down.
- Cover the loaves and let them rise again in a warm place until the dough is puffy and has risen just above the rim of the pans, about 30–60 minutes.
- Bake in a preheated 350°F (175°C) oven for 25–30 minutes, or until the loaf is golden brown and baked through. Allow the bread to cool in the pans for a few minutes, then transfer to a wire rack to cool completely before slicing.
Notes
- Yeast & Water Temperature: Use warm water, ideally around 100–110°F (38–43°C). The water should feel comfortably warm, not hot. Let the yeast mixture sit for 5 minutes to bloom before proceeding. If the yeast doesn't become slightly foamy, it may be inactive and should be replaced.
- Stand Mixer: I use my KitchenAid Artisan mixer on speed 2 when kneading this dough. KitchenAid recommends not exceeding speed 2 when kneading yeast doughs, so I recommend sticking to speed 2. Don't worry if your dough takes longer than the suggested kneading time—the windowpane test is the best indicator that it's ready. Depending on your mixer and kitchen conditions, the dough may take up to 30 minutes of total kneading time.
- Hand-Kneading: This dough can be kneaded by hand, but be prepared for a bit of an arm workout! Because the dough needs to be kneaded until it becomes smooth and elastic, it will take considerably more effort and time by hand, and you may not achieve quite the same level of smoothness and elasticity as you would with a stand mixer.
- Flour & Hydration: This recipe is formulated specifically for lower-protein bread flour (about 11–12% protein). If using a higher-protein bread flour (about 13–14% protein), increase the water to 425 g to account for its greater absorption. Do not add extra flour to the dough, even if it feels wet or sticky during mixing. The hydration is intentional and, with lower-protein bread flour, will result in a soft, smooth, and elastic dough once properly kneaded.
- Yield & Shaping: This recipe makes 2 loaves of bread. For evenly sized loaves, weigh the dough and divide the total weight by 2, using that weight for each loaf. To make a single loaf, simply halve all of the ingredients.
- Pullman Loaf Pan: A Pullman loaf pan creates a loaf with straight sides and a flat top. If using one, allow the dough to rise until it reaches the top of the pan before baking. This gives the bread its signature square shape.
- Storage: Store the bread in an airtight container or sealed bag at room temperature for up to 3 days. If the bread begins to lose some of its softness, lightly toast or warm it before serving to refresh the texture. For longer storage, refrigerate the bread or freeze it in an airtight container or freezer-safe bag. Allow refrigerated bread to come to room temperature before serving, or gently warm it for the best texture.